How to Clean Silver: The Best Methods, Step by Step
Tarnish is sulphur, not dirt. The gentlest way to clean silver jewellery, cutlery and silver plate, plus when a foil bath or dip is the right call.
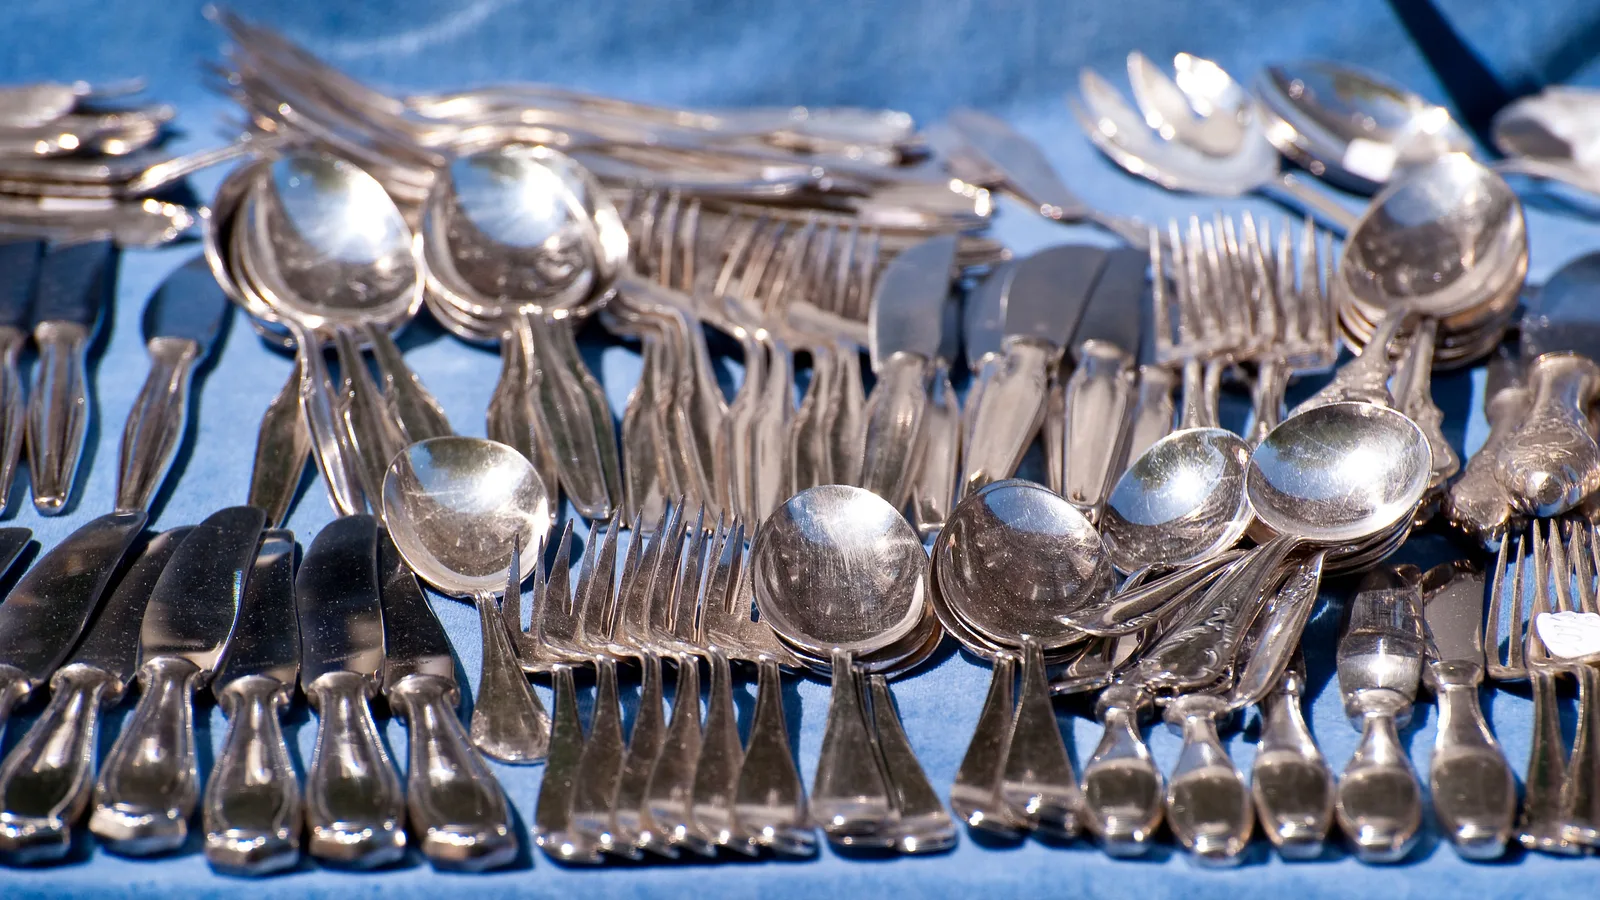
The short answer: gentlest first
Silver tarnish is not dirt. It is silver sulphide, a dark film that forms when silver meets sulphur compounds in the air — which is why a spoon can turn brown in a drawer it has never been used from. Attacking it with the strongest thing in the cupboard is the wrong instinct, because every abrasive pass takes a sliver of silver with it.
So work upwards. Warm water, a drop of washing-up liquid and a soft cloth lift grease and dust; a dry silver polishing cloth handles most light, fresh tarnish. If the piece is still brown or flat, move to a wash-off silver foam or a cream polish, applied sparingly and worked into the pattern with a soft brush. Save a foil and bicarbonate bath or a chemical silver dip for tarnish that has really taken hold — and read the construction of the piece first, because both can do damage that polishing cannot undo.
What you need before you start
None of this is specialist kit, but having it out before you begin stops you improvising with something harsh.
- Two or three soft, lint-free cloths — microfibre or well-washed cotton. One for washing, one for drying, one clean and dry for the final buff.
- A soft brush — a baby toothbrush or a clean make-up brush, for pattern, joins and the backs of fork tines.
- Mild washing-up liquid and warm water. Not hot, and never bleach or a chlorinated bathroom cleaner.
- Cotton buds and a wooden cocktail stick for crevices and the area around settings.
- A silver polishing cloth, plus a wash-off silver foam or cream polish for heavier tarnish.
- For the foil bath: a glass or ceramic bowl, aluminium foil, bicarbonate of soda and table salt.
Work over a folded towel rather than a hard worktop, and put the plug in if you are anywhere near a sink. Chains, earring backs and small charms are at their most lost when wet and slippery.
Cleaning silver, step by step
-
Identify the metal and what is attached to it
Look for a hallmark, then for stones, pearls, enamel, bone, cord, glued joints or a hollow handle. Anything glued, filled or set with a soft stone should not be soaked. If the piece is silver plate, assume every method below needs the gentlest version of itself.
-
Wash off grit before you polish
Fill a bowl with warm water and a drop of washing-up liquid. Swirl the piece, work the soft brush gently into any pattern, rinse under running warm water and pat dry. Polishing over dust and grit drags it across the surface like sandpaper.
-
Start with a dry polishing cloth
A silver polishing cloth is the safest thing for light tarnish. Rub along the length of the piece rather than across the engraving, and turn the cloth to a clean patch as it blackens. Black marks on the cloth are the tarnish lifting, not the silver disappearing.
-
Use polish sparingly where tarnish has settled
A pea-sized amount of silver foam or cream, worked in with a soft brush or cloth, one small section at a time. Keep it off stones, pearls, ivory and cord, and do not scrub hard over raised decoration — you will flatten the detail you are trying to show off.
-
Rinse and dry completely
Polish left in a join dries to a grey paste that is far harder to shift than the tarnish was. Rinse in warm water, run a cotton bud around settings and inside handles, then dry with a soft cloth and leave the piece in a warm, dry room for a few minutes.
-
Escalate only if tarnish is still there
If the piece is still brown after polishing, move to the foil bath or a dip — but check the warnings below first, because both strip deliberate oxidation and both are unsuitable for set stones and glued parts.
-
Buff with a clean, dry cloth
A final buff with a cloth that has never touched polish is what brings up the shine. Wash and dry your hands first; greasy fingerprints undo ten minutes of work in seconds.
The foil and bicarbonate bath: what it does and when not to use it
This is the one household method with real chemistry behind it. Aluminium is more reactive than silver, so in hot water with bicarbonate of soda — and a little salt to help the solution carry a current — the foil gives up electrons and the silver sulphide on the surface is converted back to silver. The tarnish has not dissolved into the water; it has moved onto the foil, which is why the foil blackens and the silver does not.
-
Line a glass or ceramic bowl with aluminium foil
Shiny side up, and enough foil that the piece can rest on it. Do not use a metal bowl, which changes the reaction.
-
Add bicarbonate of soda, salt and just-boiled water
Roughly a tablespoon of bicarbonate of soda and a teaspoon of salt, then enough water to cover the piece. Stir once to dissolve.
-
Rest the silver on the foil and watch it
The piece needs to touch the aluminium. Lift it out and check every minute; light tarnish usually clears in two to three minutes and there is nothing to gain from leaving it in longer.
-
Rinse thoroughly and dry at once
Warm running water, then a soft cloth. Salt left in a join will restart the corrosion you have just removed.
-
Buff to bring the shine back
The bath leaves a flat, slightly chalky white finish. The shine comes back with a dry cloth, not with more time in the water.
Which method suits which piece
| Method | Sterling silver (925) | Silver plate | Antiqued / oxidised silver |
|---|---|---|---|
| Polishing cloth | Yes — first choice | Yes, light pressure only | Yes, but keep off the recesses |
| Cream or foam polish | Yes, rinse carefully | Only occasionally; over-polishing wears the layer | Avoid — it lifts the darkening |
| Foil and bicarbonate bath | Yes, if unset and not glued | Risky once the plate is worn | No |
| Chemical silver dip | Yes, seconds rather than minutes | No | No |
| Ultrasonic cleaner | Plain pieces only | Not if the plate is lifting | No |
Two rules cover most of the table. The thinner the silver, the gentler the method: a plated piece has microns to lose, a sterling piece has a fraction of a millimetre of surface it can afford to give up each year. And the more deliberate the finish, the less you should interfere — a piece sold as antiqued is meant to look dark in the hollows, and no amount of cleaning will put that back evenly.
Jewellery, chains and pieces with stones
Jewellery punishes impatience more than cutlery does, because the weak point is rarely the silver.
- Chains tangle and stretch when hung wet. Lay them flat on a towel, and clean between the links by drawing a soft cloth back and forth rather than pulling.
- Closed settings and filigree trap water. Use a cotton bud and a dry brush rather than soaking.
- Pearls should never be soaked, dipped or sprayed; wipe with a barely damp soft cloth and dry immediately.
- Porous and soft stones — opal, turquoise, malachite, coral, amber, jet, lapis — should not meet water, polish or dip at all.
- Elastic, thread, leather and silk cord will weaken in water. Clean the metal only, with a cloth.
After any wet cleaning, check each setting with a fingertip. A stone that moves has been loosened, and it is cheaper to have a jeweller tighten a claw now than to lose the stone later.
Silver dip: quick, but not kind
Why people reach for it
- It works in seconds, which matters when you are cleaning a full canteen of cutlery before a dinner.
- It reaches into pattern, engraving and chain links where a cloth simply cannot go.
- It is far less abrasive than polishing, so it removes no measurable silver from the surface.
What it costs you
- It strips deliberate oxidation, leaving antiqued pieces flat and grey.
- It is unsuitable for silver plate, pearls, most coloured stones and anything glued.
- The fumes need an open window, and it must be rinsed off thoroughly before the piece touches food or skin.
- Used routinely it leaves silver looking slightly dull rather than bright, because the surface is chemically cleaned but not buffed.
What commonly goes wrong — and the fix
- Grey paste in the pattern after polishing. Old polish caught in a join. Soften it with warm soapy water and a brush, then lift it out with a cocktail stick. Never dig with a pin or a knife.
- The piece looks duller after the foil bath. That is normal. The bath converts the tarnish but leaves a matte surface; it needs a dry buff afterwards.
- Tarnish is back within a fortnight. Look at where it was stored: wool, felt, cardboard, newspaper and rubber bands all release sulphur, and a damp bathroom speeds everything up.
- Pink or copper-coloured patches on silver plate. The silver layer has worn through to the base metal. No cleaning will fix this; the piece needs replating.
- Fine scratches after cleaning. Usually toothpaste, a scouring pad or kitchen paper, all of which are too abrasive for silver. Grit left on a cloth does the same thing.
- A black cloth after buffing. Expected. It is mostly tarnish and polish residue, not silver, though a heavily used cloth on a worn plated piece will take some silver with it.
Drying and storing so it stays bright
Cleaning is only half the job; the tarnish returns from the air, so a dry, low-sulphur drawer buys you months.
- Dry thoroughly before storing, including inside handles, hinge joints and the backs of settings.
- Use an anti-tarnish cloth, bag or drawer liner designed for silver, or wrap pieces in acid-free tissue. Ordinary plastic wrap and damp cardboard are not improvements.
- Keep silver away from wool, felt, rubber, elastic and newspaper, all of which give off sulphur compounds.
- Store in a cool, dry cupboard rather than a bathroom, a conservatory or anywhere that swings between damp and warm.
- Do not stack pieces loose. Silver is soft; a drawer of loose forks will scratch itself as it shifts. Cutlery rolls and felt-lined dividers, not newspaper, do this job.
- Never store silver in a dishwasher, even overnight after a dinner. Detergent residue and damp are both unkind.
Common questions about cleaning silver
Can I clean silver with toothpaste?
It is not a good idea. Toothpaste contains abrasives hard enough to scratch silver and to wear through silver plate, and the whitening varieties are worse. A purpose-made silver polish does the same job without the scratches.
Does bicarbonate of soda work on its own?
Only mildly. As a paste it is a gentle abrasive that will shift light tarnish with a lot of rubbing; it does not convert silver sulphide back to silver the way the foil bath does. On silver plate, the rubbing is the problem.
Why does my silver go black again so quickly?
Tarnish is a reaction with sulphur compounds in the air, and some storage makes it far worse: wool, felt, rubber bands, cardboard, newspaper and damp rooms. Move the piece to an anti-tarnish bag or cloth in a dry cupboard and the interval between cleans lengthens considerably.
Can I put silver jewellery in an ultrasonic cleaner?
Only plain silver with no stones, no glue and no deliberate darkening. Ultrasonic cleaning can loosen settings, damage porous stones and strip oxidation, and it is not suitable for silver plate that is already thin.
Is it safe to clean silver with lemon juice?
Lemon juice is a mild acid and will loosen some surface tarnish, but it leaves a sticky residue that attracts dirt and does nothing for the deeper sulphide film. Warm water, washing-up liquid and a polishing cloth is the better first move.
Related articles
How to Remove Scratches from Sunglasses Without Ruining Them
Most lens scratches cannot be polished out at home — but some can. Work out which kind you have, then clean, polish and protect them safely.

How to Style Boyfriend Jeans: A Practical Guide
A practical guide to styling boyfriend jeans: balance the volume, fix the hem, choose shoes and layers, and solve the most common fit and styling problems.
How to tell if a Rolex is real: what to check, in order
A practical, step-by-step guide to spotting a fake Rolex: dial printing, the date lens, rehaut engraving, serial numbers and when to call a watchmaker.